Click
on any picture on this page for a larger version!
In
February-March 2004 we replacing our wrought-iron
stair railings, which were pretty dated looking,
with new oak railings. We had planned on
doing this to our old home, which had the same
type of railings, but never got it done.
When we moved into this home, we knew we'd want to
make sure it happened.
We did the
work ourselves, and took pictures throughout the
project, which you can browse here. These
pictures show Before, During and After.
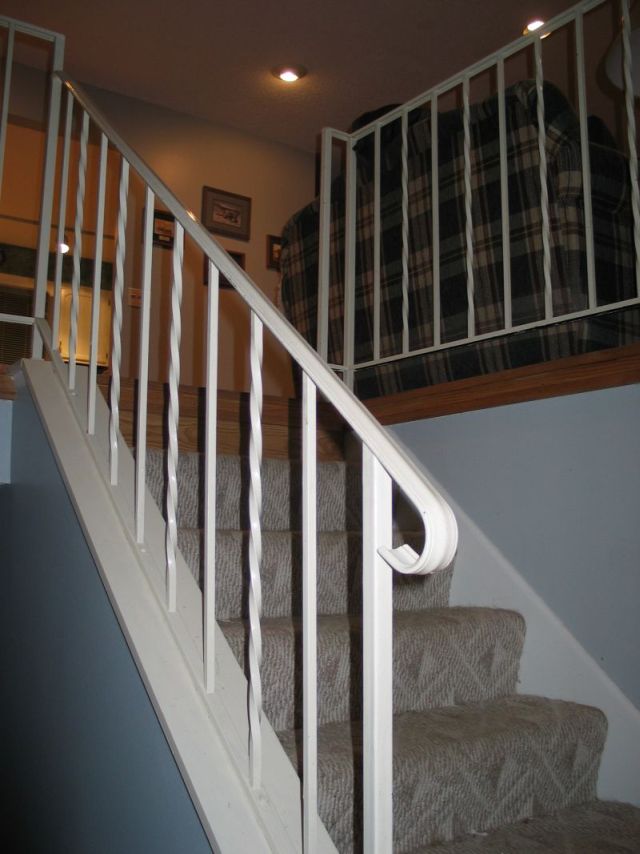
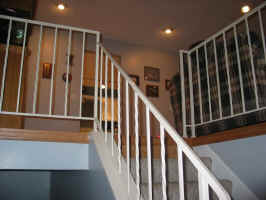
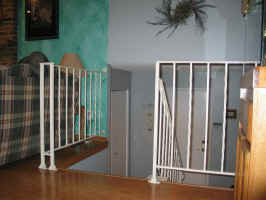
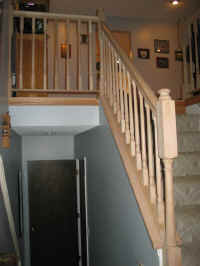
Before:
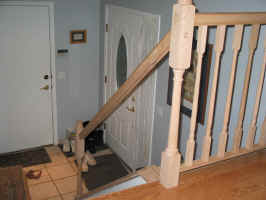
First, some
"before" pictures. The original
railing was black wrought iron. The previous
owner went on an almond binge and painted almost
everything in the house almond -- all of the oak
trim, doors, cabinets, walls-- and this railing.
We have converted most of the almond trim and
doors to white, but we left this railing almond,
knowing it was just going to be replaced soon
anyway.
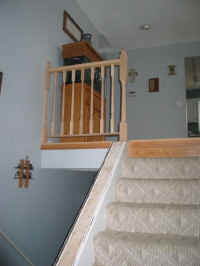
This war the
original railing that separates our upstairs level
from our main entry foyer:

During:
 Our
first task was to remove the small straight
railing separating the stairway from the upper
level. We then installed the newel post and
half-newel which supports the new oak railing.
To the left, you can see the newel post in place--
the yellow device is a post level.
Our
first task was to remove the small straight
railing separating the stairway from the upper
level. We then installed the newel post and
half-newel which supports the new oak railing.
To the left, you can see the newel post in place--
the yellow device is a post level.
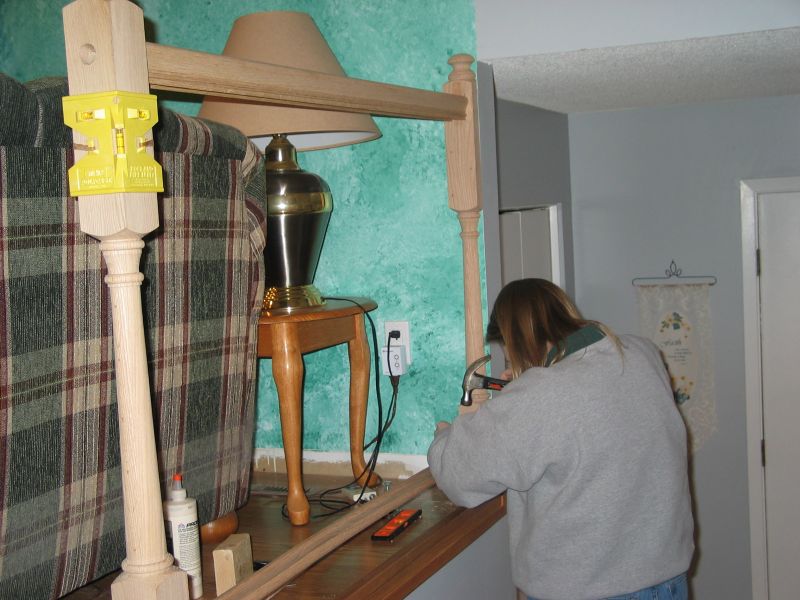
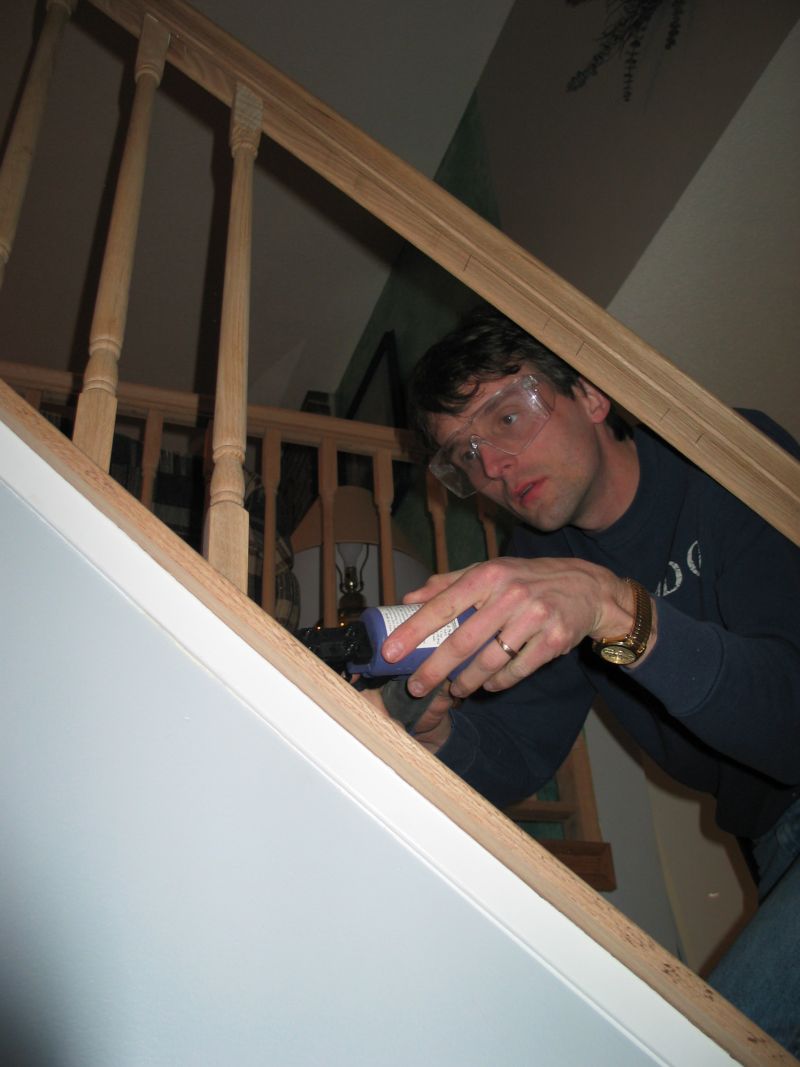
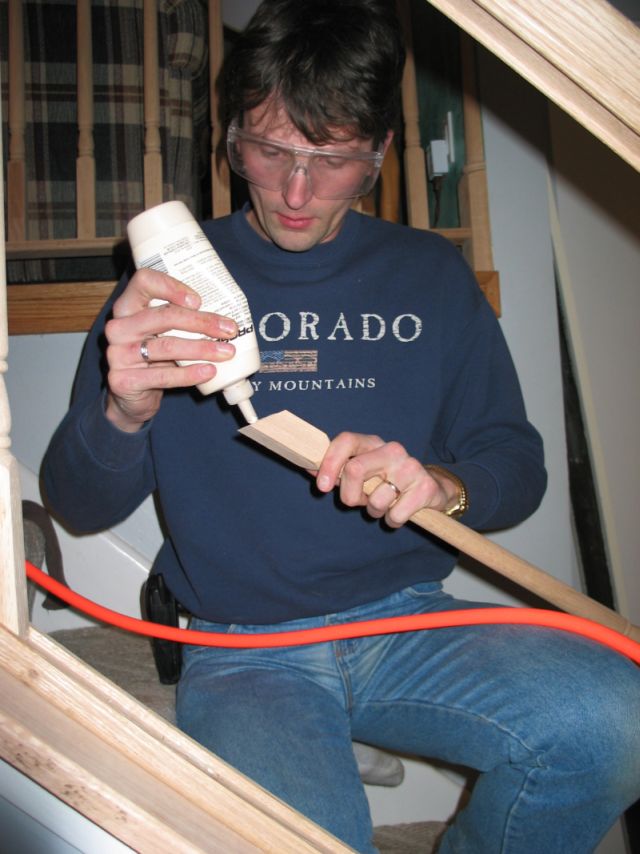
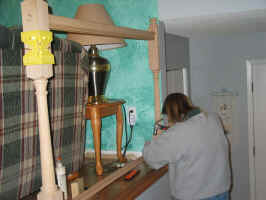 This
picture shows the upper and lower rails in place.
Cathy is countersinking some nails which hold the
lower rail in place (the nails were toenailed with
a pneumatic finish nailer).
This
picture shows the upper and lower rails in place.
Cathy is countersinking some nails which hold the
lower rail in place (the nails were toenailed with
a pneumatic finish nailer).
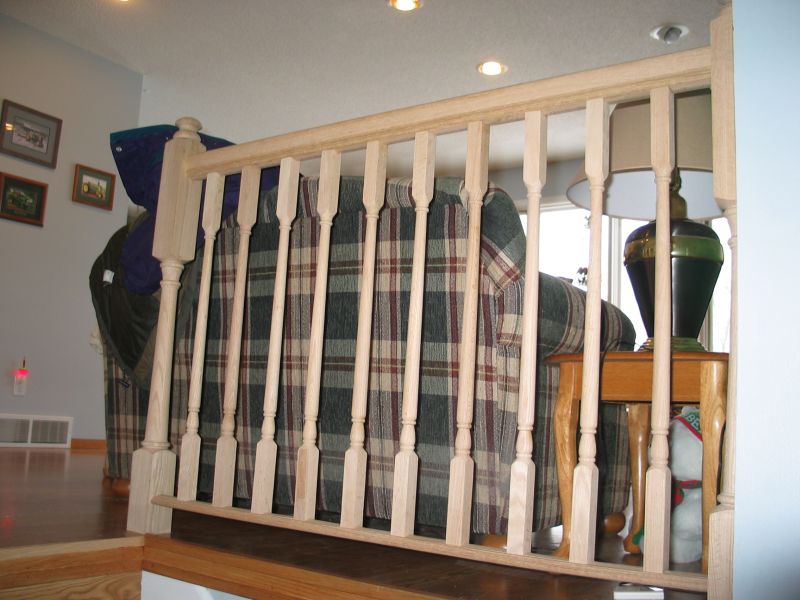
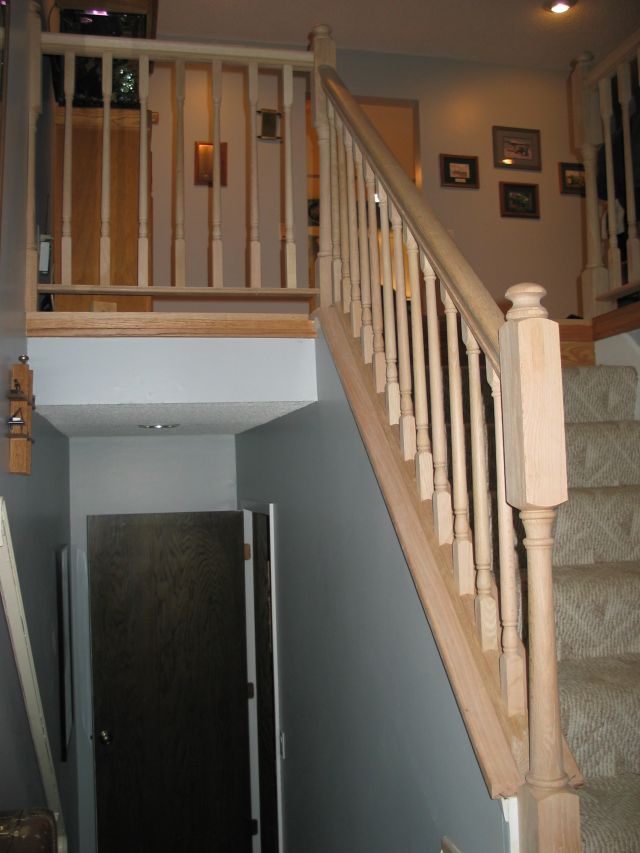
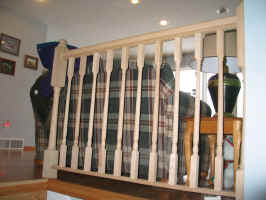 Here
is the completed small railing, sans finishing.
To get to this point from the last picture, we cut
each baluster to the proper length, glued it into
the proper position, and tacked it into place with
a pneumatic brad nailer. Then, small
"fillet" strips are cut to length
between each baluster and fit in the upper and
lower rails, giving it a finished look. Rail
spacing is carefully governed by code -- a 4"
sphere must not pass between any point on the
finished railing. This required a bit of
math and careful calculations, since the spindles
are tapered.
Here
is the completed small railing, sans finishing.
To get to this point from the last picture, we cut
each baluster to the proper length, glued it into
the proper position, and tacked it into place with
a pneumatic brad nailer. Then, small
"fillet" strips are cut to length
between each baluster and fit in the upper and
lower rails, giving it a finished look. Rail
spacing is carefully governed by code -- a 4"
sphere must not pass between any point on the
finished railing. This required a bit of
math and careful calculations, since the spindles
are tapered.
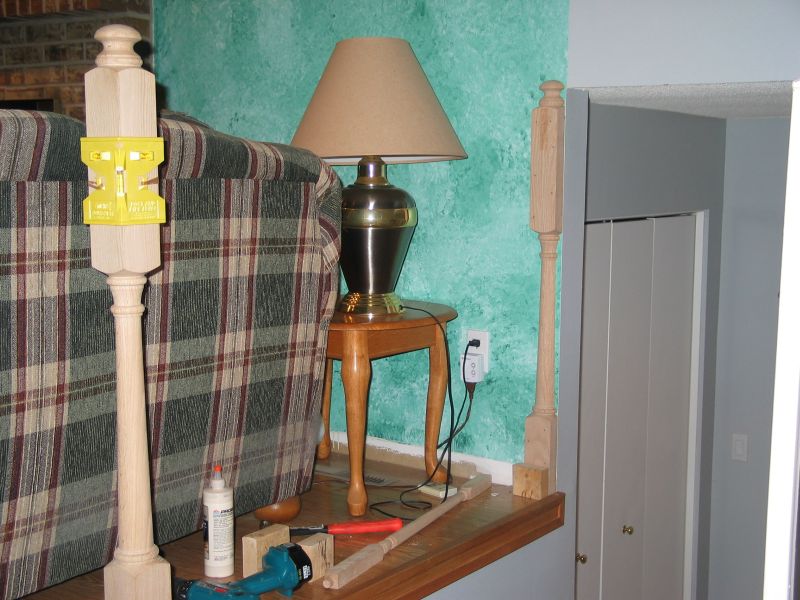
 The
next step was to remove the other wrought-iron
railing. This railing was one large piece,
making up the straight upper section, and the
angled section down the stairs (see the
"before" pictures above). We also
removed the trim board underneath the railing, so
it could be replaced with a new oak board finished
to match the new railing. We used the same
procedure as above to install the small upper
railing at the top of the stairs.
The
next step was to remove the other wrought-iron
railing. This railing was one large piece,
making up the straight upper section, and the
angled section down the stairs (see the
"before" pictures above). We also
removed the trim board underneath the railing, so
it could be replaced with a new oak board finished
to match the new railing. We used the same
procedure as above to install the small upper
railing at the top of the stairs.
 Next
work began on the angled railing. First, the
bottom newel post was cut to length and installed
with lag screws into the framing of the stairway.
Next, a new oak board was ripped to proper width,
and mitered to fit over the top of the stairway
framing. Finally, the bottom shoe rail was
installed on top of this board.
Next
work began on the angled railing. First, the
bottom newel post was cut to length and installed
with lag screws into the framing of the stairway.
Next, a new oak board was ripped to proper width,
and mitered to fit over the top of the stairway
framing. Finally, the bottom shoe rail was
installed on top of this board.
 Installing
the upper railing proved to be tricky.
Getting the length and miter cuts just right
required a lot of careful measuring. We
practiced with a cheap 2x4 stud and thought we had
the technique down. However, we messed up,
and ended up cutting one of the miters the wrong
direction. Since this rail is $6.60/linear
foot, we thought this was going to be a very
expensive mistake. Fortunately, Home Depot
gave us credit for the remaining length of the
board, so we only lost one linear foot, and were
able to purchase a new rail and install it
properly.
Installing
the upper railing proved to be tricky.
Getting the length and miter cuts just right
required a lot of careful measuring. We
practiced with a cheap 2x4 stud and thought we had
the technique down. However, we messed up,
and ended up cutting one of the miters the wrong
direction. Since this rail is $6.60/linear
foot, we thought this was going to be a very
expensive mistake. Fortunately, Home Depot
gave us credit for the remaining length of the
board, so we only lost one linear foot, and were
able to purchase a new rail and install it
properly.
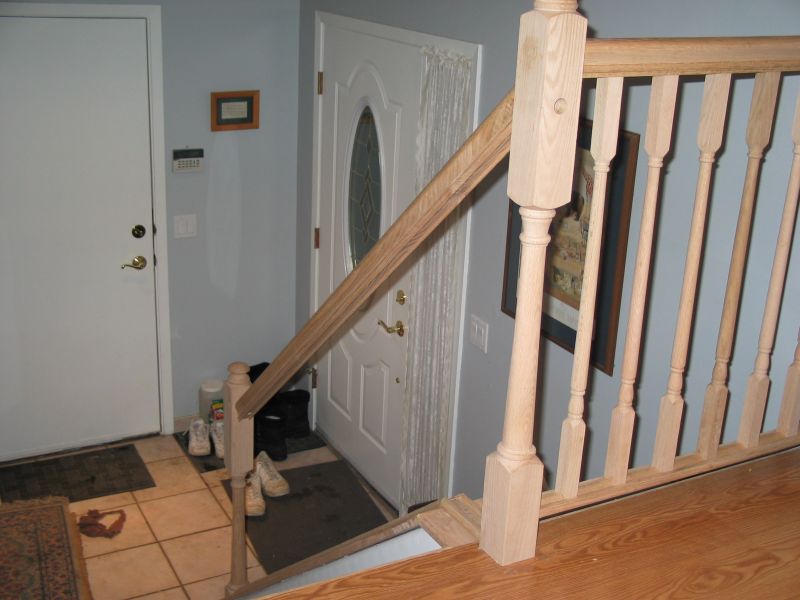
 Here's
a view from the entryway of the installed upper
railing. We were quite relieved to have this
piece installed properly!
Here's
a view from the entryway of the installed upper
railing. We were quite relieved to have this
piece installed properly!
 Here
Tim installs some of the balusters on the angled
railing. Each baluster needed to be
carefully miter-cut to the proper angle. As
with the railings above, careful math and codes
dictated the spacing between baluster spindles.
Here
Tim installs some of the balusters on the angled
railing. Each baluster needed to be
carefully miter-cut to the proper angle. As
with the railings above, careful math and codes
dictated the spacing between baluster spindles.
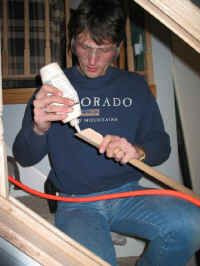 Each
baluster was glued, then brad-nailed with a
pneumatic nailer.
Each
baluster was glued, then brad-nailed with a
pneumatic nailer.
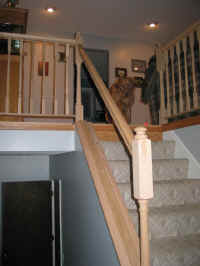
 The
completed railing system! This picture was
taken right before the stain went on (hence the
masking tape in the picture).
The
completed railing system! This picture was
taken right before the stain went on (hence the
masking tape in the picture).
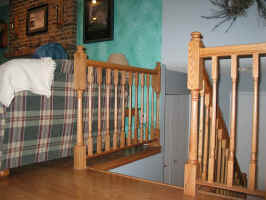
 Another
view of the completed railing. If you look
carefully to the left of this picture, you will
see the almond wrought-iron railing leading
downstairs. This railing was also replaced,
but not at the time this picture was taken.
Another
view of the completed railing. If you look
carefully to the left of this picture, you will
see the almond wrought-iron railing leading
downstairs. This railing was also replaced,
but not at the time this picture was taken.
After:
 The
finished view, from the top! We used a
Minwax stain finish, which matched the color of
our floors and related trim. Then we
installed three coats of Minwax rub-on
polyurethane. This was the first time we
used rub-on poly, and we loved it. It was a
joy to work with, especially with so many
hard-to-reach surfaces to cover.
The
finished view, from the top! We used a
Minwax stain finish, which matched the color of
our floors and related trim. Then we
installed three coats of Minwax rub-on
polyurethane. This was the first time we
used rub-on poly, and we loved it. It was a
joy to work with, especially with so many
hard-to-reach surfaces to cover.
 Another
view from the top, looking at the other top
railing.
Another
view from the top, looking at the other top
railing.
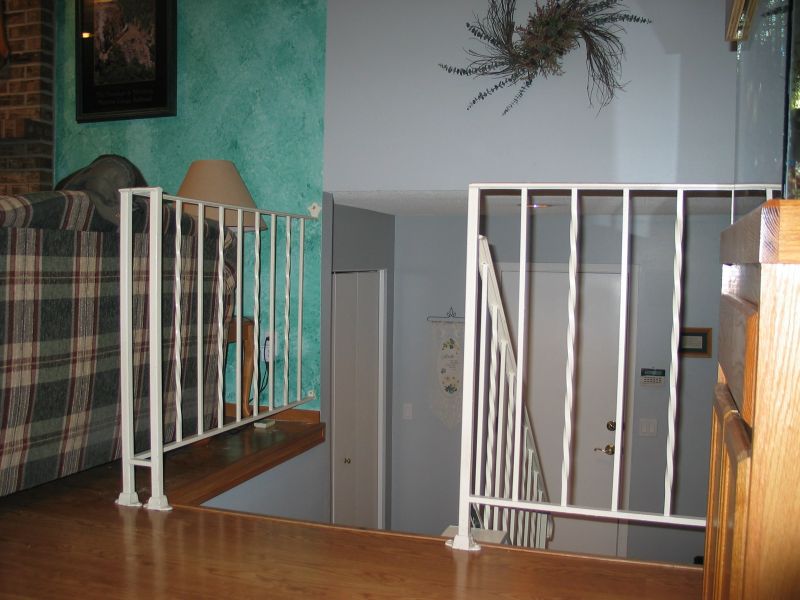
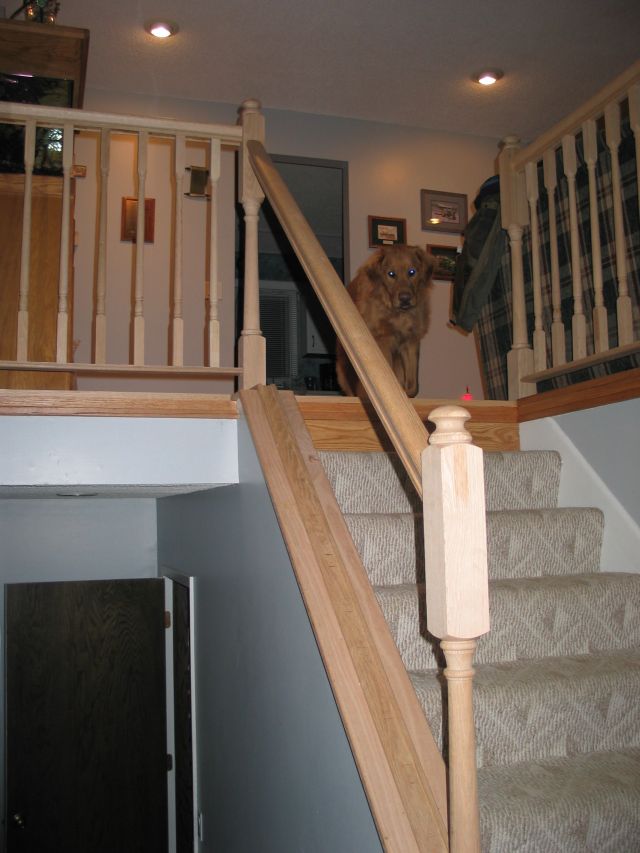
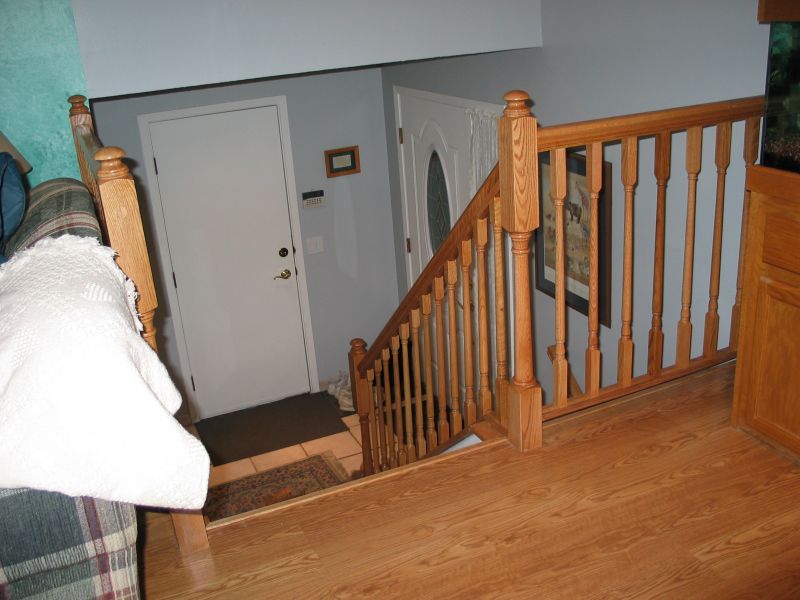
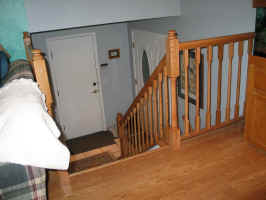
 The
view from the entry foyer. Here, you can
also see the new oak railing leading downstairs.
Since this picture was taken, we have replaced the
carpeting you see here with new as well.
The
view from the entry foyer. Here, you can
also see the new oak railing leading downstairs.
Since this picture was taken, we have replaced the
carpeting you see here with new as well.
We hope you
enjoyed this before/during/after series of photos
on our new stairway railing!
This page was last
updated on Wednesday, January 11, 2006