Click on any picture on this
page for a larger version!
We started
the weekend of June 19 by building the foundation
and floor for the shed:
 The
hardest part about the foundation was getting it
all level. We laid out a level reference
line over what we thought was level ground, but it
ended up having about a 10" slope.
Since we are building under several trees, height
was a concern. We ended up excavating a lot
of dirt to level out the site.
The
hardest part about the foundation was getting it
all level. We laid out a level reference
line over what we thought was level ground, but it
ended up having about a 10" slope.
Since we are building under several trees, height
was a concern. We ended up excavating a lot
of dirt to level out the site.
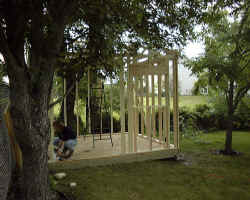
 Framing
itself for the foundation went quite smoothly,
once we had the rim joists leveled and squared.
In this picture, Cathy double-checks everything
before we lay down the plywood on top, as Bailey
looks on. The building is next to Bailey's
outdoor run, but the run is plenty long so that
it's not blocking much of his view.
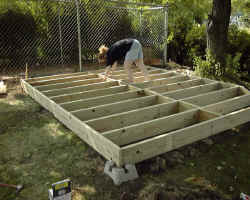
Framing
itself for the foundation went quite smoothly,
once we had the rim joists leveled and squared.
In this picture, Cathy double-checks everything
before we lay down the plywood on top, as Bailey
looks on. The building is next to Bailey's
outdoor run, but the run is plenty long so that
it's not blocking much of his view.
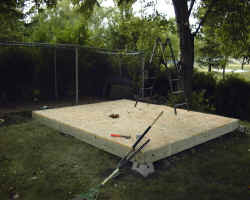 The
finished foundation! The plywood went on
very smoothly, and then we cleaned up the large
piles of dirt excavated from under parts of the
foundation. Finally, Tim got out the ladder
to prune back some low-hanging tree branches in
preparation for the rest of the building's
construction.
The
finished foundation! The plywood went on
very smoothly, and then we cleaned up the large
piles of dirt excavated from under parts of the
foundation. Finally, Tim got out the ladder
to prune back some low-hanging tree branches in
preparation for the rest of the building's
construction.
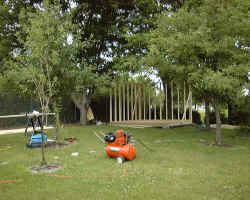
For the
remainder of the week, we had a nice "raised
wooden patio" as time commitments, as well as
the weather, didn't allow us to get any further
with building. However, the following
weekend was our "framing blitz".
We prepared for it Thursday by picking up a ton of
building materials (shown below) at Menards.
Cathy and I started framing on Friday, and on
Saturday we were joined by friend Mike Becker who
helped us frame the remaining walls, set them up,
and set the roof trusses.
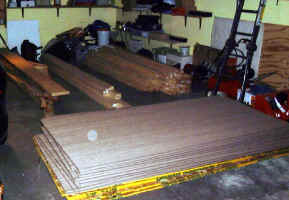 Here
is a photo of many of the building supplies
sitting in our garage Thursday night. Sorry
for the poor quality -- the digital camera we had
at this time took lousy flash photos.
Here
is a photo of many of the building supplies
sitting in our garage Thursday night. Sorry
for the poor quality -- the digital camera we had
at this time took lousy flash photos.
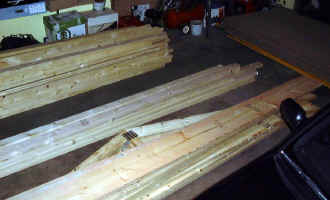 Another
photo of the "lumber stash". You
can see the large pile of studs, pile of roof
trusses and header boards, and the big pile of
roof sheathing and siding.
Another
photo of the "lumber stash". You
can see the large pile of studs, pile of roof
trusses and header boards, and the big pile of
roof sheathing and siding.
 This
picture was taken relatively early on Saturday,
after we raised the side and back walls and braced
them into position. A pneumatic framing
nailer was loaned to us by friends Aaron and Dawn
Lundeen, and made the job infinitely easier and
faster.
This
picture was taken relatively early on Saturday,
after we raised the side and back walls and braced
them into position. A pneumatic framing
nailer was loaned to us by friends Aaron and Dawn
Lundeen, and made the job infinitely easier and
faster.
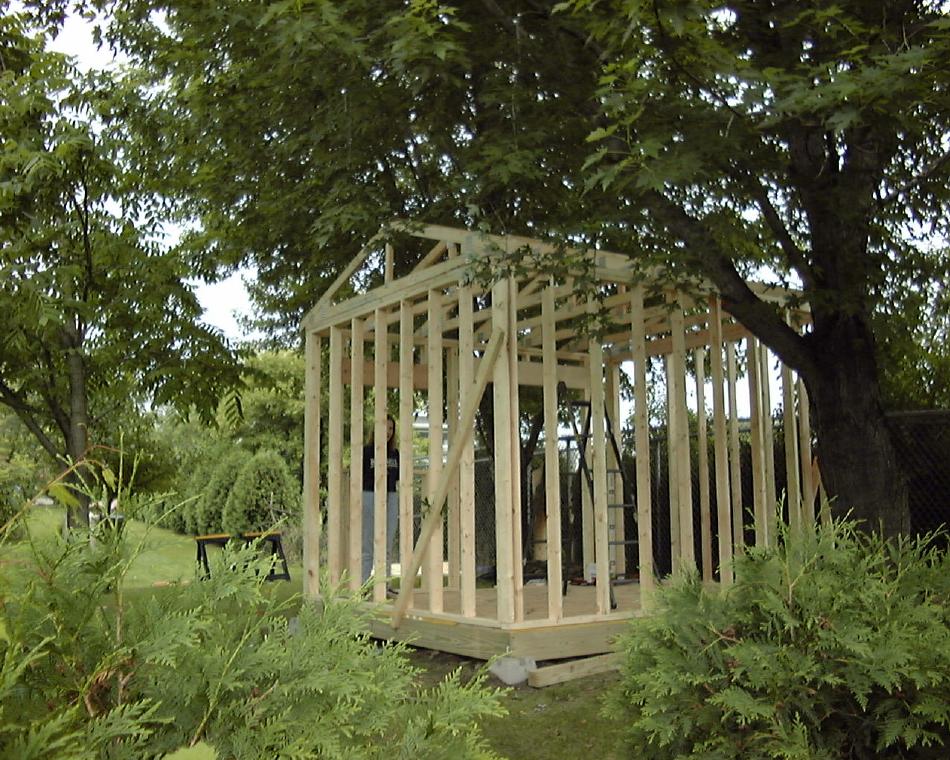
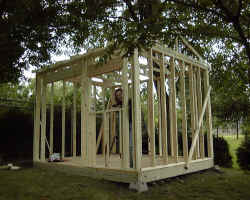 We
didn't pause to take any other photos-- this one
shows where we stopped for the day when rain
started falling. The front of the building
will have a roll-up door and a window (being
demonstrated by Cathy). We made good
progress before the rain-- getting all the walls
framed and trusses up and temporarily braced.
We
didn't pause to take any other photos-- this one
shows where we stopped for the day when rain
started falling. The front of the building
will have a roll-up door and a window (being
demonstrated by Cathy). We made good
progress before the rain-- getting all the walls
framed and trusses up and temporarily braced.
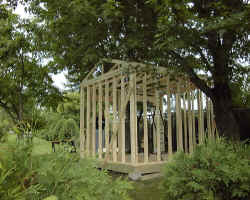 Here's
a view from the rear of the shed. The
trusses made roof construction simple -- just
place them and nail them up (bracing them
temporarily with some scrap wood). At this
stage the gables still need to be framed out a bit
wider so there will be a slight overhang on the
gable ends.
Here's
a view from the rear of the shed. The
trusses made roof construction simple -- just
place them and nail them up (bracing them
temporarily with some scrap wood). At this
stage the gables still need to be framed out a bit
wider so there will be a slight overhang on the
gable ends.
 The
intensity of the rain increased quickly, so I
snapped one final picture of Cathy bringing in the
last of the tools and supplies. Now that
framing is essentially complete (other than the
gable framing mentioned above) the next task is to
hang the plywood siding and roof sheathing.
The
intensity of the rain increased quickly, so I
snapped one final picture of Cathy bringing in the
last of the tools and supplies. Now that
framing is essentially complete (other than the
gable framing mentioned above) the next task is to
hang the plywood siding and roof sheathing.
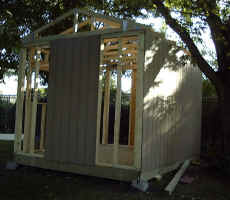 The
next two days (Sunday and Monday) we were able to
get some of the siding hung. The siding
we're using is some nice quality 4x8 plywood
siding which looks like 8" boards hung
vertically. One nice thing about this type
of siding is that it serves as both the sheathing
and the siding, so it means less work. This
picture shows the back of the shed fully sided,
and the two sides partially sided.
The
next two days (Sunday and Monday) we were able to
get some of the siding hung. The siding
we're using is some nice quality 4x8 plywood
siding which looks like 8" boards hung
vertically. One nice thing about this type
of siding is that it serves as both the sheathing
and the siding, so it means less work. This
picture shows the back of the shed fully sided,
and the two sides partially sided.
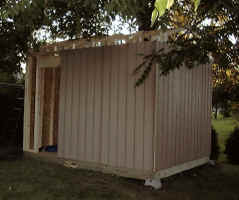
 Here's
a view from the front, which has yet to be sided.
Having the back wall finished definitely makes the
shed start to look more complete. With just
the two of us working, it was a bit tricky at
first to position each panel and get it hung in
the proper place, be we got better at it as we
went along.
Here's
a view from the front, which has yet to be sided.
Having the back wall finished definitely makes the
shed start to look more complete. With just
the two of us working, it was a bit tricky at
first to position each panel and get it hung in
the proper place, be we got better at it as we
went along.
 Oops,
what happened to the window and half the door?
This picture was taken as we worked on the front
siding-- the openings will be cut out of the
siding once it's hung. One other note is
that this siding comes pre-primed the brown color
you see. We will be painting the shed a
light brown with dark brown trim to match our
house.
Oops,
what happened to the window and half the door?
This picture was taken as we worked on the front
siding-- the openings will be cut out of the
siding once it's hung. One other note is
that this siding comes pre-primed the brown color
you see. We will be painting the shed a
light brown with dark brown trim to match our
house.
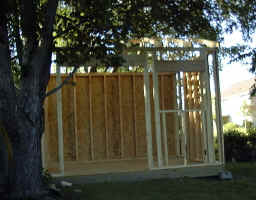
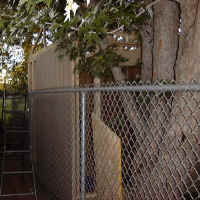 Here's
a view of the side of the shed, from inside
Bailey's run. Having the shed this close to
the fence makes for some tricky work. We had
hoped to side the wall before we set it up, but
the way the walls are staggered didn't allow for
this. At the time this picture was
taken, we had one panel of siding to go on the
front, and the partial panel left to go on the
side you see here, as well as the gable ends,
which also need to be framed out so there is a
slight overhang.
Here's
a view of the side of the shed, from inside
Bailey's run. Having the shed this close to
the fence makes for some tricky work. We had
hoped to side the wall before we set it up, but
the way the walls are staggered didn't allow for
this. At the time this picture was
taken, we had one panel of siding to go on the
front, and the partial panel left to go on the
side you see here, as well as the gable ends,
which also need to be framed out so there is a
slight overhang.
To continue on with Page 2
of the shed pictures, please Click
Here.
This page was last
updated on Sunday, March 30, 2008